Use TinyMCE as the Rich Text Editor in SharePoint Forms
The default rich text editor (RTE) in SharePoint® 2007 doesn’t quite cut it in my opinion, and here’s why:
- It’s based on an ActiveX control, so it only works in Internet Explorer. This alone is reason enough to replace it.
- When creating a multiple line of text column in a custom list, you can only choose between “Plain text,” “Rich text,” or “Enhanced rich text” as the format for the column—not a lot of options. What if you want your users to have access to headings or other HTML elements?
- It generates horrible, deprecated code:
<DIV>Look at how <EM>bad </EM>this HTML is! If I start <SPAN style="color: #ff6600;">coloring things </SPAN>it gets really messy. I try to make sure I'm not getting too crazy with the content, but many users will select <SPAN style="font-family: 'Comic Sans MS';">their own fonts</SPAN>, <SPAN style="font-size: small;">sizes</SPAN>, <SPAN style="background-color: #33cccc;">colors</SPAN>, etc. instead of keeping things simple, which makes the markup even worse.</DIV> <DIV> </DIV> <DIV>Why does it use <div> tags instead of <p> tags? Why are the elements in all caps?</DIV> <DIV> </DIV> <DIV><SPAN style="color: #ff6600; font-family: 'Times New Roman'; font-size: medium;"><STRONG>Now if I try to make an entire section formatting differently, it gets weird with <font> tags and <span> tags.</STRONG></SPAN></DIV> <DIV><SPAN style="color: #000000; font-size: xx-small;"> </SPAN></DIV> <DIV><SPAN style="font-size: xx-small;">Users probably don't know about the Clear Format button, so when they want to add "normal" text after their crazy colored, centered, bolded text, they try to match the normal text with even MORE direct formatting.</SPAN></DIV> <DIV><SPAN style="font-size: xx-small;"> </SPAN></DIV> <DIV><SPAN style="font-size: xx-small;">Now try using this content in a branded site and see if your CSS holds up. Let a user edit this a few times and you'll have nested <span>s all over the place with all kinds of formatting.</SPAN></DIV>
- Even the Full HTML RTE that you get on Publishing Pages (or if you create your own site column of this type) generates the same kind of markup. You have a few more options, like selecting basic HTML elements (paragraphs, headings, address, etc.), but you still can’t customize what appears.
A decade ago this RTE would have been really cool, but in today’s standards-compliant, feature-rich web, it just doesn’t hold up.
Enter TinyMCE, an open-source RTE with tons of customization OOTB, and even more thanks to numerous plugins (you can even write your own plugins if you need something that it doesn’t have). In this post I’ll show you how I replaced the SharePoint RTE with TinyMCE on my custom list forms using a little jQuery.
Note: This isn’t a tutorial about using TinyMCE for all rich text editing in SharePoint; it shows you how to use it on a per-form basis.
Why TinyMCE?
There are lots of RTEs out in the wild, but I picked TinyMCE for several reasons:
- It’s JavaScript-based, and it works on all major browsers.
- It’s extensible with plugins, so I can make it do almost anything I want. My personal JavaScript skills are my only limitation.
- It’s theme-able, so I can make it blend in with any branding that I use.
- It’s fast; it only loads the plugins you tell it to load, so it can be as lightweight as you want.
- WordPress uses it, so any lessons I learn customizing TinyMCE in SharePoint can be applied to creating TinyMCE plugins for WordPress, and vice versa.
Implementing TinyMCE
Before TinyMCE can be used, you need to host the scripts, CSS, and images that it uses. I typically store these in a document library at the top level of the site collection, but you can put them in any location that your users have read access to. Download and unzip TinyMCE from the website (http://tinymce.moxiecode.com/download/download.php – for this tutorial you should use the jQuery version, not the standard or development version). Once the files are unzipped, upload them to a document library or your location of choice. We’ll also be using jQuery for some DOM manipulation on the form to prep it for TinyMCE, so be sure to upload that as well if you don’t already use it in SharePoint.
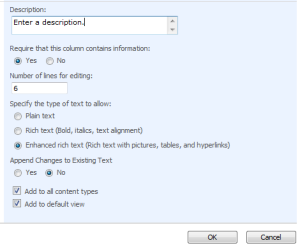
Now we need a list with a “Multiple lines of text” column on it. You probably already have a list in mind to use this on (if not, create one), so make sure the column is set to “Enhanced rich text” instead of “Plain text” or “Rich text.” If you set it to “Plain text,” SharePoint will escape the markup in the column and your users will see a bunch of HTML tags instead of nicely formatting content. Setting it to “Rich text” could probably work, but we don’t want SharePoint removing links or other markup if someone happens to edit an existing item using the default RTE in the future.

Now we can start adding our scripts to the form pages. You generally shouldn’t modify the default NewForm.aspx and EditForm.aspx pages for a list, so open your list in SharePoint Designer and make copies of both pages. I like to rename the copies “NewFormCustom.aspx” and “EditFormCustom.aspx” respectively.
Somewhere on each page (I prefer just under the <asp:Content ContentPlaceHolderId="PlaceHolderMain" runat="server"> element), create <script> tags to load jQuery (if it’s not already loaded via the Master Page) and TinyMCE. Then create another <script> block to include our code that will replace the default RTE:
<script src="/Scripts/jquery-1.5.1.min.js"></script>
<script src="/Scripts/tiny_mce/tiny_mce.js" type="text/javascript"></script>
<script type="text/javascript">
// Our script will go here
</script>
TinyMCE Initialization Options
TinyMCE can be initialized with many options. I’ll show the options that I use and explain the basics for each option. If you want to learn more you can go to http://tinymce.moxiecode.com/wiki.php/TinyMCE and read the documentation. Here is my entire TinyMCE initialization function:
// Initialize TinyMCE for Enhanced Rich Text fields
function TinyMceEnhanced() {
	tinyMCE.init({
		mode : "textareas",
		theme : "advanced",
		theme_advanced_blockformats : "p,address,pre,h2,h3,h4,h5,h6",
		skin : "o2k7",
		skin_variant : "silver",
		plugins : "table,emotions,inlinepopups,contextmenu,paste,fullscreen,xhtmlxtras",
		dialogue_type : "modal",
		theme_advanced_buttons1 : "fullscreen,formatselect,removeformat,|,bold,italic,sub,sup,|,justifyleft,justifycenter,justifyright,justifyfull,|,bullist,numlist",
		theme_advanced_buttons2 : "undo,redo,|,tablecontrols,|,outdent,indent",
		theme_advanced_buttons3 : "link,unlink,image,|,code,|,blockquote,cite,abbr,hr,|,charmap,emotions,|,cleanup,help",
		theme_advanced_buttons4 : "",
		theme_advanced_toolbar_location : "top",
		theme_advanced_toolbar_align : "left",
		theme_advanced_statusbar_location : "bottom",
		editor_selector : "tinymce-enhanced",
		content_css : "/Scripts/tinymce-enhanced.css",
		relative_urls : false
	});
}
I chose these options because they provide everything I wanted for the content that will be used on my list. This is not a recommended configuration for everyone; it is simply what worked best for me on a particular list.
| Option | Explanation |
|---|---|
| mode | I used the “textareas” mode because that’s what’s most commonly used for RTEs and it’s what SharePoint uses before it applies the default RTE |
| theme | You’ll almost always use the “advanced” theme; without it your configuration options are limited quite a bit |
| theme_advanced_blockformats | This option lets me specify which block elements will appear in the drop-down menu. In my situation, I didn’t want them using any level-1 headings, so I listed all of the default block elements except “h1.” |
| skin | TinyMCE comes with a few different skins, and more can be added (or you can make your own). Because I’m using MOSS 2007, the Office 2007 theme seemed appropriate to use. |
| skin_variant | I prefer the silver skin over the default blue skin, so I set this option to “silver.” |
| Plugins | This is a list of all of the TinyMCE plugins that I want to load. Each plugin adds some additional functionality to TinyMCE such as additional buttons. |
| dialogue_type | This sets the mode for the pop-up dialogue windows for things like adding hyperlinks or editing the source HTML code. I prefer “modal” because it keeps everything in the same window, and users are mostly familiar with this type of interaction. |
| theme_advanced_buttons1-4 | These options determine which row the buttons appear on and in what order. It also groups buttons together until a separator ” | ” is used to split up the row. I came up with a specific order for the buttons that was similar to how MS Word groups buttons for formatting text. The button will not work properly in MOSS 2007 by default because SharePoint lacks a DTD in the Master Page, so use it with caution! |
| theme_advanced_toolbar_location | This sets the location of the text formatting buttons. Typically you’d want this at the top of the Rich Text field. |
| theme_advanced_toolbar_align | This aligns the buttons in the toolbar. I chose to left-align them. |
| theme_advanced_statusbar_location | This sets the location of the status bar, which displays the DOM structure of the text in the Rich Text field. Typically this is set to “bottom.” |
| editor_selector | This is one of the most important options. It determines, in combination with the option, which elements TinyMCE will be applied to. I decided to select elements with a class of “tinymce-enhanced.” In order for this to work, I’ll need to add this class to the <textarea> elements on the forms. |
| content_css | This option specifies a .css file to use on the content of the Rich Text field. When used with a .css file that matches the branding of your SharePoint site, it provides content authors with a pseudo-preview of what their content will look like because it will use the branded fonts, colors, and sizes from the .css file. |
| relative_urls | By default, TinyMCE uses relative URLs for emoticons; if they are not stored in the same folder as the page that will display content from TinyMCE, the relative path will be wrong. I set this option to false so it uses absolute URLs. The absolute URL will still be relative to the site collection (the actual src attribute of the <img /> element will look like this: “/Scripts/tiny_mce/plugins/emotions/img/smiley-smile.gif“). |
Once you determine which options you want to use, add the TinyMCE initialization function to the <script> block you created.
Prepping the Form’s DOM so TinyMCE can be Used
Now we need to modify the DOM structure of the form page so we can use TinyMCE. First, add this line of JavaScript directly above the TinyMCE initialization function you just created:
function RTE_ConvertTextAreaToRichEdit() {}
This is the function that SharePoint executes to create the default RTE. By adding this function to the page and leaving it empty, we’ve effectively stopped the default RTE from loading.
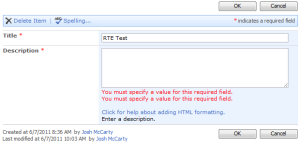
Unfortunately there is still some work to do. SharePoint doesn’t just render a <textarea> when the page is loaded in Internet Explorer, even when we override the RTE function. It also renders a hidden <input> below the <textarea>. These are further nested in two <span> elements, which complicates things a little bit.

As far as I can tell, the default RTE function handles two other interactions in the DOM. I figured this out because once I added the blanked function to the page, all of these issues appeared:
- Duplicate validation messages appear on the page (I’m guessing this has something to do with the fact that there are two elements for the column—the
<textarea>and the hidden<input>. - SharePoint wraps the contents of any “Multiple lines of text” column in a
<div>with a class that starts with “ExternalClass” when the form is submitted. If the item is edited, SharePoint will helpfully re-wrap the contents in another<div>without the default RTE function. After a few edits, you can see how this would get a little ridiculous.
Because we replaced the default RTE function with a blank function, we need to handle these interactions in our script. We should also remove the “Click here for help about adding HTML formatting” link that SharePoint displays in non-IE browsers for consistency across all browsers.

We can handle this with some DOM manipulation. First we’ll move the <textarea>, hidden <input>, and the first validation message out of the <span> containers, unwrapping any existing contents in the <textarea> so they aren’t wrapped in multiple <div>s. Next we’ll remove the <span> that used to contain them and all the other junk that we don’t need anymore. Finally, we will add the appropriate class name to the <textarea> so TinyMCE can find it (remember to use the class name set in the TinyMCE initialization options).
Create a function called “TinyMCEPrep” that accepts a column name parameter so you can target a specific column on the form to perform the DOM manipulation on, and add the following script to it:
// Prep the DOM for TinyMCE
function TinyMCEPrep(column) {
	// Cache important DOM elements so they can be manipulated
	var textarea = $('textarea[title="' + column + '"]');
	var textareaContent = $(textarea).val();
	var input = $(textarea).next('input');
	var parentSpan = $(textarea).parent().parent();
	var parentCell = $(textarea).closest('td.ms-formbody');
	var extraValidationMsg = $('span.ms-formvalidation', parentCell).filter(':first');

	// Remove redundant divs around content of the textarea
	$(parentCell).append('<div id="textarea-holder" style="display:none;"></div>');
	$('#textarea-holder').html(textareaContent);
	if ( $('#textarea-holder div[class^="ExternalClass"]').length !== 0 ) {
		var fixedTextareaContent = $('#textarea-holder div[class^="ExternalClass"]').html();
		$(textarea).val(fixedTextareaContent);
	}
	$('#textarea-holder').remove();

	// Move textarea, input, and validation msg outside of span
	$(extraValidationMsg).prependTo(parentCell);
	$(input).prependTo(parentCell);
	$(textarea).prependTo(parentCell).after('<br />');

	// Get rid of span and all the junk inside it
	$(parentSpan).remove();

	// Add the class name for TinyMCE to the textarea
	$(textarea).addClass('tinymce-enhanced');
}
Now that this function is on the page, you can apply it to a column using jQuery’s ready function:
$(document).ready(function(){
	TinyMCEPrep('Description');
});
To use TinyMCE on multiple columns, simply add another line inside the ready function that calls TinyMCEPrep(); with the name of each column you want to use it on.
Applying TinyMCE
Now that the DOM is ready, the last step is to call our TinyMCE initialization function. This should be done within the ready function above, but after the TinyMCEPrep(); functions.
$(document).ready(function(){
	TinyMCEPrep('Description');
	TinyMceEnhanced();
});
Here is the entire script with all of the functions needed to use TinyMCE; you’ll probably have to modify this for your own environment:
// Override default RTE function
function RTE_ConvertTextAreaToRichEdit() {}

// Initialize TinyMCE for Enhanced Rich Text fields
function TinyMceEnhanced() {
	tinyMCE.init({
		mode : "textareas",
		theme : "advanced",
		theme_advanced_blockformats : "p,address,pre,h2,h3,h4,h5,h6",
		skin : "o2k7",
		skin_variant : "silver",
		plugins : "table,emotions,inlinepopups,contextmenu,paste,fullscreen,xhtmlxtras",
		dialogue_type : "modal",
		theme_advanced_buttons1 : "fullscreen,formatselect,removeformat,|,bold,italic,sub,sup,|,justifyleft,justifycenter,justifyright,justifyfull,|,bullist,numlist",
		theme_advanced_buttons2 : "undo,redo,|,tablecontrols,|,outdent,indent",
		theme_advanced_buttons3 : "link,unlink,image,|,code,|,blockquote,cite,abbr,hr,|,charmap,emotions,|,cleanup,help",
		theme_advanced_buttons4 : "",
		theme_advanced_toolbar_location : "top",
		theme_advanced_toolbar_align : "left",
		theme_advanced_statusbar_location : "bottom",
		editor_selector : "tinymce-enhanced",
		content_css : "/Scripts/tinymce-enhanced.css",
		relative_urls : false
	});
}

// Prep the DOM for TinyMCE
function TinyMCEPrep(column) {
	// Cache important DOM elements so they can be manipulated
	var textarea = $('textarea[title="' + column + '"]');
	var textareaContent = $(textarea).val();
	var input = $(textarea).next('input');
	var parentSpan = $(textarea).parent().parent();
	var parentCell = $(textarea).closest('td.ms-formbody');
	var extraValidationMsg = $('span.ms-formvalidation', parentCell).filter(':first');

	// Remove redundant divs around content of the textarea
	$(parentCell).append('<div id="textarea-holder" style="display:none;"></div>');
	$('#textarea-holder').html(textareaContent);
	if ( $('#textarea-holder div[class^="ExternalClass"]').length !== 0 ) {
		var fixedTextareaContent = $('#textarea-holder div[class^="ExternalClass"]').html();
		$(textarea).val(fixedTextareaContent);
	}
	$('#textarea-holder').remove();

	// Move textarea, input, and validation msg outside of span
	$(extraValidationMsg).prependTo(parentCell);
	$(input).prependTo(parentCell);
	$(textarea).prependTo(parentCell).after('<br />');

	// Get rid of span and all the junk inside it
	$(parentSpan).remove();

	// Add the class name for TinyMCE to the textarea
	$(textarea).addClass('tinymce-enhanced');
}

$(document).ready(function(){
	TinyMCEPrep('Description');
	TinyMceEnhanced();
});
This is the exact order of the script elements that I used on my test form. I placed this right below <asp:Content ContentPlaceHolderId="PlaceHolderMain" runat="server">:
<script type="text/javascript" src="/Scripts/jquery-1.5.1.min.js"></script>
<script type="text/javascript" src="/Scripts/tiny_mce/tiny_mce.js"></script>
<script type="text/javascript">

// Override default RTE function
function RTE_ConvertTextAreaToRichEdit() {}

// Initialize TinyMCE for Enhanced Rich Text fields
function TinyMceEnhanced() {
	tinyMCE.init({
		mode : "textareas",
		theme : "advanced",
		theme_advanced_blockformats : "p,address,pre,h2,h3,h4,h5,h6",
		skin : "o2k7",
		skin_variant : "silver",
		plugins : "table,emotions,inlinepopups,contextmenu,paste,fullscreen,xhtmlxtras",
		dialogue_type : "modal",
		theme_advanced_buttons1 : "fullscreen,formatselect,removeformat,|,bold,italic,sub,sup,|,justifyleft,justifycenter,justifyright,justifyfull,|,bullist,numlist",
		theme_advanced_buttons2 : "undo,redo,|,tablecontrols,|,outdent,indent",
		theme_advanced_buttons3 : "link,unlink,image,|,code,|,blockquote,cite,abbr,hr,|,charmap,emotions,|,cleanup,help",
		theme_advanced_buttons4 : "",
		theme_advanced_toolbar_location : "top",
		theme_advanced_toolbar_align : "left",
		theme_advanced_statusbar_location : "bottom",
		editor_selector : "tinymce-enhanced",
		content_css : "/Scripts/tinymce-enhanced.css",
		relative_urls : false
	});
}

// Prep the DOM for TinyMCE
function TinyMCEPrep(column) {
	// Cache important DOM elements so they can be manipulated
	var textarea = $('textarea[title="' + column + '"]');
	var textareaContent = $(textarea).val();
	var input = $(textarea).next('input');
	var parentSpan = $(textarea).parent().parent();
	var parentCell = $(textarea).closest('td.ms-formbody');
	var extraValidationMsg = $('span.ms-formvalidation', parentCell).filter(':first');

	// Remove redundant divs around content of the textarea
	$(parentCell).append('<div id="textarea-holder" style="display: none;"></div>');
	$('#textarea-holder').html(textareaContent);
	if ( $('#textarea-holder div[class^="ExternalClass"]').length !== 0 ) {
		var fixedTextareaContent = $('#textarea-holder div[class^="ExternalClass"]').html();
		$(textarea).val(fixedTextareaContent);
	}
	$('#textarea-holder').remove();

	// Move textarea, input, and validation msg outside of span
	$(extraValidationMsg).prependTo(parentCell);
	$(input).prependTo(parentCell);
	$(textarea).prependTo(parentCell).after('<br />');

	// Get rid of span and all the junk inside it
	$(parentSpan).remove();

	// Add the class name for TinyMCE to the textarea
	$(textarea).addClass('tinymce-enhanced');
}

$(document).ready(function(){
	TinyMCEPrep('Description');
	TinyMceEnhanced();
});
</script>
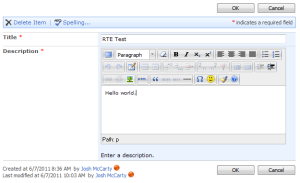
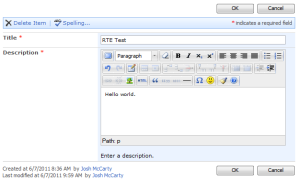
The results are just what I was looking for; IE, Firefox, and Chrome all render the rich text column exactly the same using TinyMCE:


Important Considerations
As you can see, this is not a trivial amount of DOM manipulation, so be aware of the potential for performance issues on slower clients. In my test environment, it worked fine in IE8, Firefox, and Chrome. IE8 took about 1 second to process all of the script and render TinyMCE; the other browsers were much faster (as expected). This probably wouldn’t be a good solution for a complex form with lots of rich text fields, but for smaller forms it works just fine.
If you decide to create a custom form using a Data Form Web Part instead of using the default form, you can convert the SharePoint field into an ASP <textarea>, give it the appropriate class name for TinyMCE to find it, and call the TinyMCE initialization function without needing the DOM manipulation function at all. This results in a much leaner and faster implementation of TinyMCE.
Note: If you don’t have SharePoint Designer and can’t get it (it’s free), you can edit the default forms from the browser by adding “toolpaneview=2” to the URL query string. The URL for a new item form would look like “http://myserver/sitename/lists/listname/NewForm.aspx?toolpaneview=2.” From here you can add a Content Editor Web Part to the page, set it to hidden, and enter the JavaScript above using the button (or link to a .txt file that contains the script).
Please let me know if you use this script and how well it works for you. I’m interested to see what kinds of performance issues, if any, other people have using it. There may be better approaches to the DOM manipulation function that are faster than my solution, so if you come up with anything that seems to work better, I’d love to hear about it!
Comments
Comments are closed