How to Bulk-resize Images in macOS using Preview

⚠️ This was originally posted on April 12, 2023. The information may be outdated!
I recently needed to resize a few dozen high-resolution images so that I could upload them to a WordPress website. The host and/or WordPress configuration was showing an error message instead of generating the typical thumbnail, medium, and large image sizes for several of the images because they were too large in terms of pixel dimensions. This wasn’t for a photography site or anything that needed extremely large images (some were 6,000 x 4,000 pixels) so I wanted to quickly resize the images and try uploading again rather than work around the limitation somehow.

Fortunately I came across a blog post that explained how to use the Preview app that comes with macOS to resize multiple images at once. I’ll include the steps here for posterity.
- Select the images to resize in Finder (tip: you can select images scattered across multiple sub-folders by using the Search feature in Finder to search for images).
- Right-click on the selected images and open them with Preview.
- Select all of the images within the Preview app.
- Go to Tools > Adjust Size and resize accordingly.
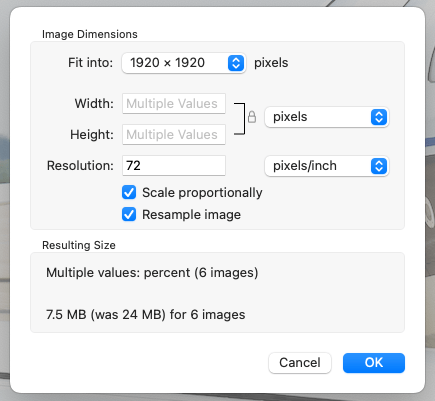
For my purposes, I used the option to contain the images within 1920 x 1920 pixels. These were for the web, after all.