Installing and Using Console Emulators – Part 1
Many emulators are available for popular game consoles, and I’ll show you how to set up and configure emulators for the NES, SNES, Genesis, and N64 so you can play them on your Windows PC.
Note: These emulators are free to download and use, but the ROMs that contain the actual games for them are copyrighted, even though sites like ROMNation.NET make them available for download.
I prefer to use FCEUX for NES, SNES9x for SNES, Fusion for Genesis, and Project64 for N64. Download the latest version of each of these from an emulator site such as The Emulator Zone. Once they are downloaded, you are ready to install and configure them.
FCEUX
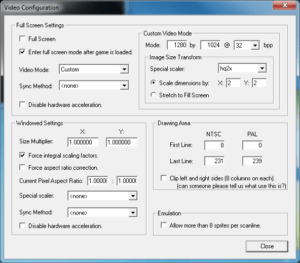
Installing FCEUX is as simple as extracting the files from the .zip file that you downloaded. I’d recommend putting them into a folder called “NES” to separate them from your other emulators. Once the files are extracted, run the FCEUX application and set up the video configuration (Config > Video…). I use the following settings:

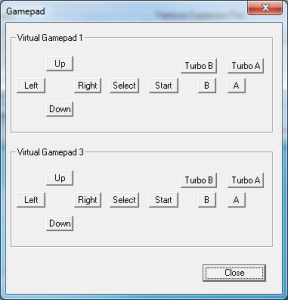
Next you should set up the input configuration (Config > Input…). You can use the keyboard as your input device, but I highly recommend a gamepad. I use Logitech gamepads, but any gamepad compatible with Windows should work just fine.
To setup two controllers, you’ll need to click the button for Port 1 and Port 2, then assign your gamepad’s buttons to the virtual gamepads in FCEUX. You only need to assign the top virtual gamepad in the Gamepad configuration window (Virtual Gamepad 1 for Port 1, and Virtual Gamepad 2 for Port 2). To assign a button, use your mouse to click on the virtual button, then press the button on your gamepad that you want to associate with the virtual button. Do this for all buttons in the virtual gamepad.

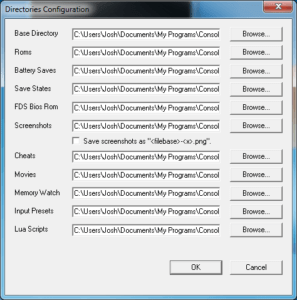
Finally, you’ll want to set up the directories configuration (Config > Directories…). This tells the program where to look for ROMs and where to put save states, screenshots, etc. At a minimum, set up your Roms directory by clicking the button and browsing to the folder where you keep your NES ROMs.

I leave all other settings at their default values; however, feel free to experiment with the other settings available. The program has a decent Help file to get you started with your first ROM as well as short explanations of the other functions in the program.
In Part 2 I’ll go over SNES9x. Stay tuned…
Series: Installing and Using Console Emulators
- Installing and Using Console Emulators – Part 1
- Installing and Using Console Emulators – Part 2
- Installing and Using Console Emulators – Part 3
- Installing and Using Console Emulators – Part 4
Comments
%postcontent%to the beginning of the Series Post List Template setting. That will move the output of Organize Series to the end of your post.Comments are closed