My RetroPie Tweaks

⚠️ This was originally posted on May 1, 2022. The information may be outdated!
I recently lost my RetroPie SD card due to corruption and had to recreate my RetroPie setup. So I thought I’d document my personal post-install steps this time around. I use a Raspberry Pi 3B+ connected to an Onkyo receiver, a couple of Xbox 360 controllers connected to a USB wireless adapter, 8BitDo SN30 pro wireless controllers, and a Logitech K400 wireless keyboard with touchpad to control things from the sofa. I also keep my config and game files on a Synology NAS instead of on the SD card itself so I don’t lose save games, etc. if another SD card gets corrupted.
After the RetroPie image is flashed to the SD card and the Pi boots up for the first time, I exit the EmulationStation controller setup and get back to the command line (press F4) and run sudo raspi-config to make some changes.
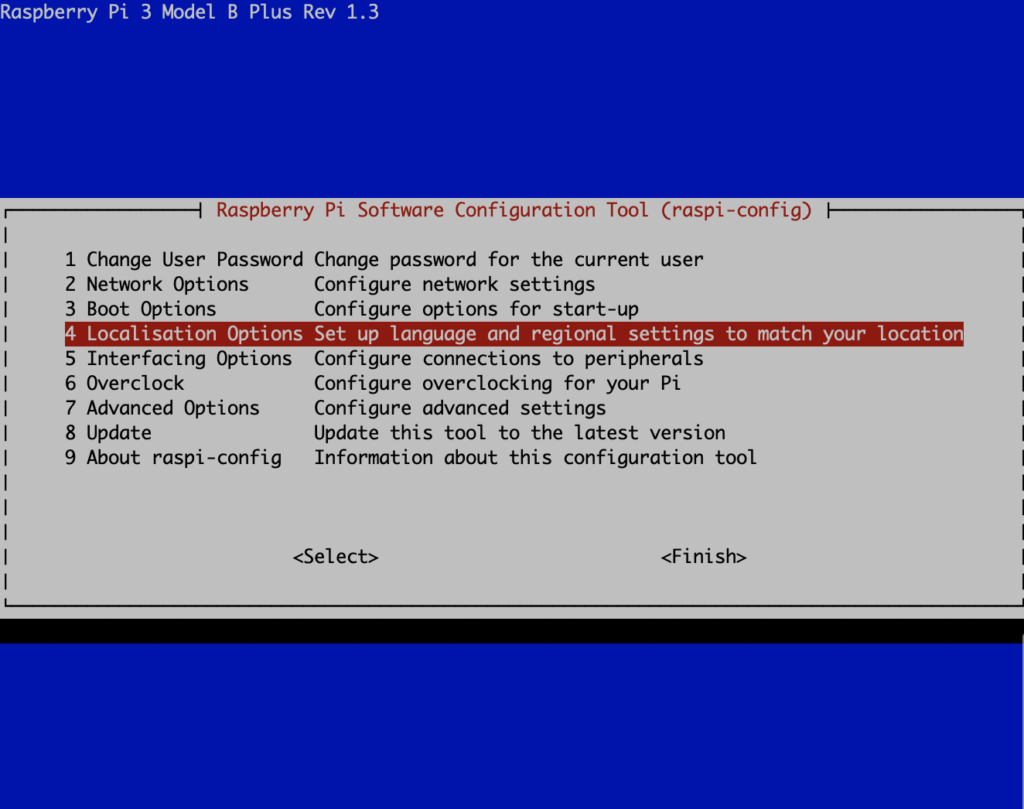
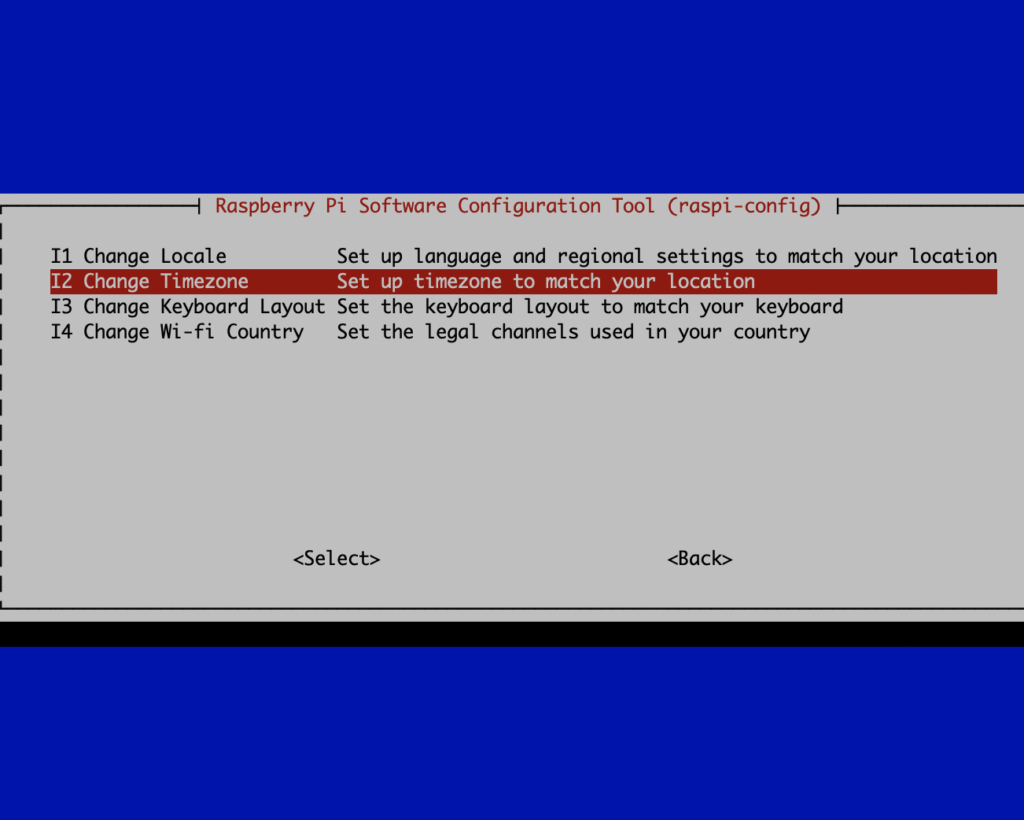
First I go into the Localisation Options and set the Wi-fi Country and Timezone.
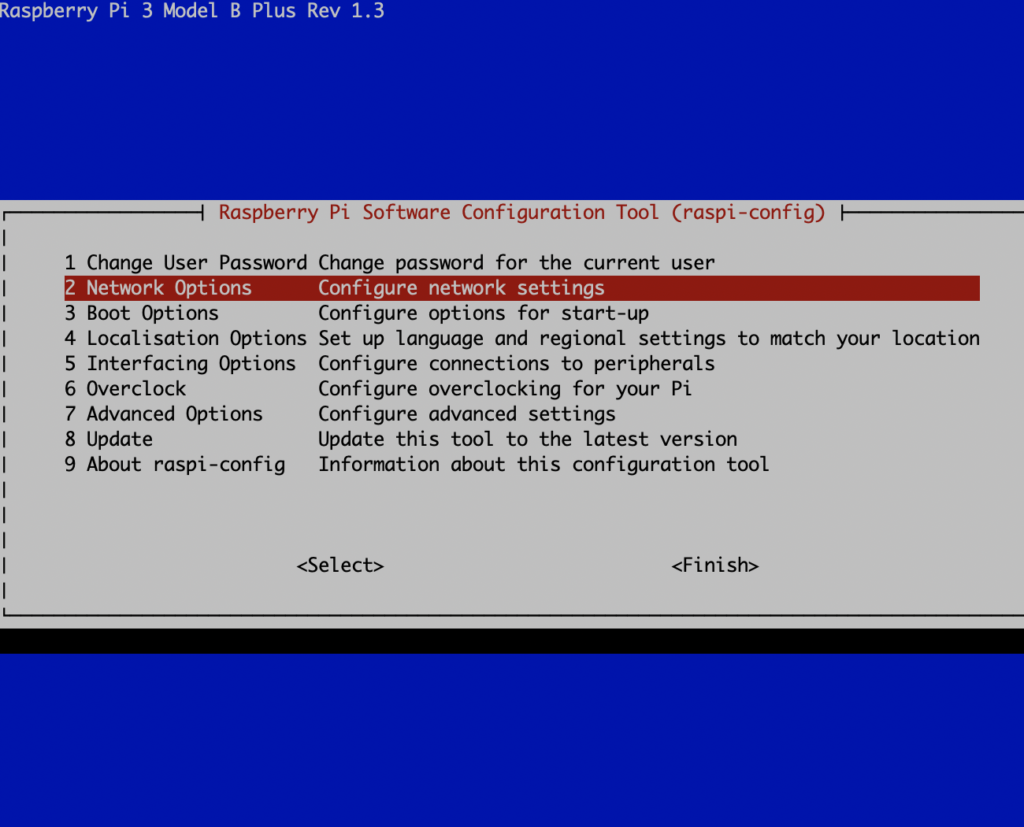
Next I connect to my WiFi network in the Network Options. The 3B+ supports 5Ghz so I choose that for better throughput.
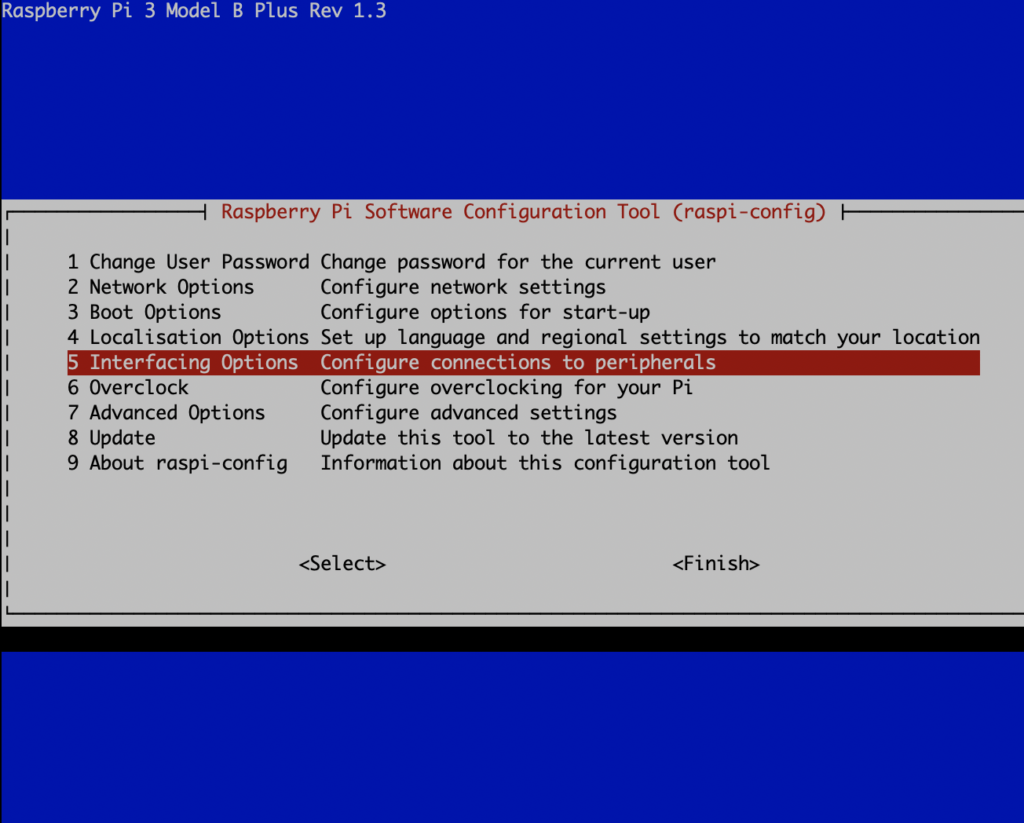
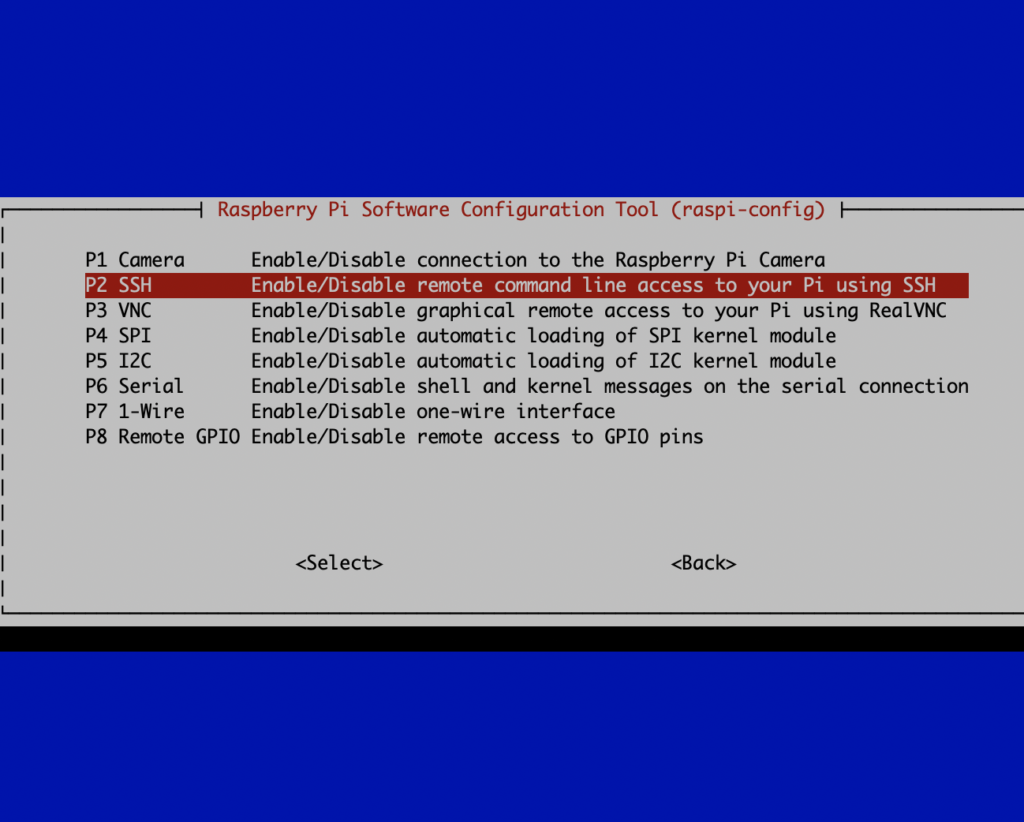
To enable remote command line access I enable SSH from the Interfacing Options menu:
Finally, I exit the raspi-config tool to get back to the command line and change the default password for the pi user using the passwd command. I save this in my password manager so I don’t forget it!
Next I reboot the Pi so all of the changes can take affect with shutdown -r now.
Fix Overscan
For some reason on my setup there is a black border around everything by default. This can be corrected via the overscan settings, so I have to follow the documentation in the My image has a border section to remove the border:
sudo nano /boot/config.txtThen uncomment the #disable_overscan=1 line be deleting the # at the beginning of the line and save the changes with ctrl+o and exit the nano editor with ctrl+x. Reboot with sudo shutdown -r now to make the change take effect.
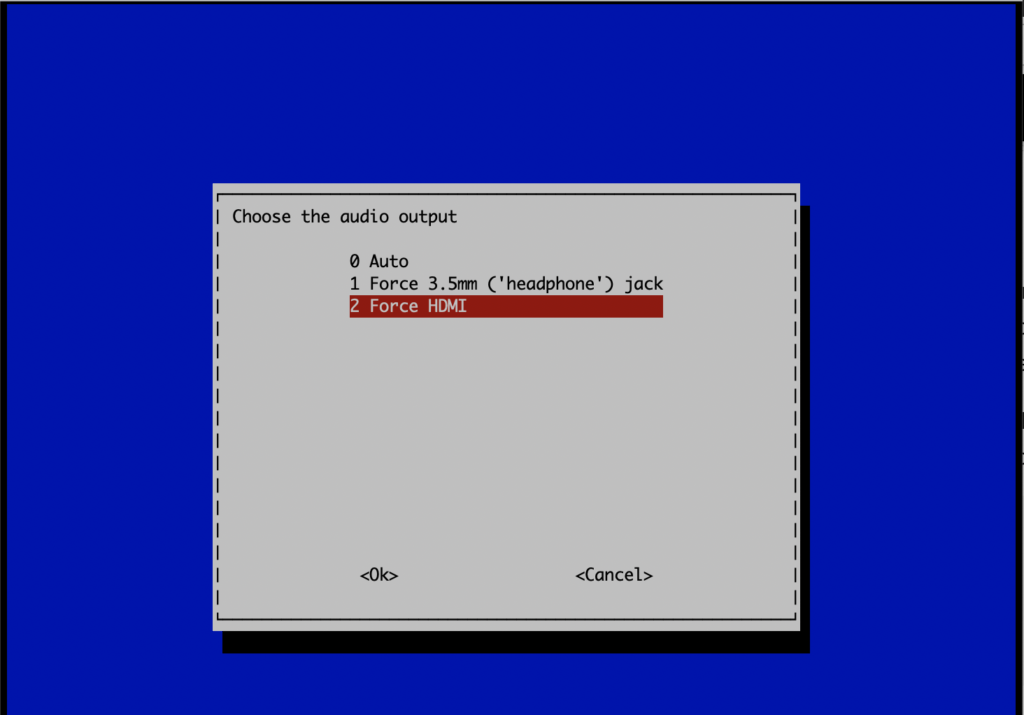
Fix Audio Output
Again, for some reason with my setup there is an issue, this time being no audio by default (perhaps an EDID issue with my Onkyo receiver?). To fix it, I use sudo raspi-config to manually set the audio output to HDMI. Go to Advanced Settings > Audio > Force HDMI.


This should work without a reboot. I test it by starting up EmulationStation with the emulationstation command, then open the RetroPie settings. As I move up/down between menu items, I can hear the “click” sounds to confirm audio is working.
Fix Keyboard Layout
When using my Logitech keyboard some keys weren’t typing the proper character, which makes it difficult to use the command line. To fix this (I’m in the United States), I made a simple change to the keyboard configuration using sudo nano /etc/default/keyboard and changing the “gb” to “us” and saving the changes. Then after a reboot the keyboard works as expected.
Run ROMs from a Network Share
The official documentation covers this, so I’ll just add a few notes here. I’m running my ROMs from a Synology NAS that is always on at home. To do this, I create a new shared folder in DiskStation Manager (DSM) called “RetroPie” and within that folder I copied /home/pi/RetroPie/roms from the Pi so it had all of the game systems’ folders ready for me to drop my ROMs into.
Note: The genesis folder is symlinked to the megadrive folder on the Pi, so either only use the megadrive folder or recreate the symlink on the NAS.
I also created a new user in DSM for this shared folder and gave it read/write access to just this folder so the RetroPie can log in as that user and not have access to anything else on my NAS. That is more secure than just using the admin credentials for the NAS. Be sure that the SMB setting in DSM allows for the connection version (1.0 in the example below).
Per the documentation, I edited the autostart.sh file but I used a slightly different command to successfully mount the shared folder from my Synology NAS:
sudo mount -t cifs -o vers=1.0 //nas_ip_address/RetroPie/roms /home/pi/RetroPie/roms -o username=mynasusername,password=mynasuserpasswordAfter a reboot, the change took affect and I was able to see my ROMs in EmulationStation. However, they were not being scraped properly.
Scrape ROMs and Add Video Previews
The built-in scraper hasn’t worked great for me, and it doesn’t seem to get video previews. So I use Steven Selph’s Scraper per the documentation. You can also check out this video:
After running the retropie_setup.sh script, choose Manage Packages > Manage Optional Packages. Scroll way down and select scraper and install it. After a few minutes it should be finished installing, then choose Configuration/Options and update the settings per the screenshot below.


Finally, choose Scrape All Systems and wait a while for everything to scrape and download.
Finally, exit the setup script and start up EmulationStation again with emulationstation. The ROMs should now display additional information when browsing through them. The videos may not work yet, so open the main menu, go to UI Settings and change the Gamelist View Style to “Video,” then go back and open Other Settings, and turn on Use OMX Player (HW Accelerated) to make the videos play.
RetroFlag SNES Case
I wanted a unique case for my RetroPie setup, so I went ahead and purchased a RetroFlag SNES SuperPi case. This has a nice feature where you can use the power and reset buttons to turn on and safely shutdown or reboot the Raspberry Pi. You just have to run the scripts they provide in their documentation. It works like a charm and is a really nice feature.
A Note On Controllers
For the 8BitDo SN30 pro wireless controllers, I’ve found that they work best in Nintendo Switch mode before pairing them to the system. I tried Xinput mode at first but the triggers would not register when configuring the controllers in EmulationStation. So I had to remove them and re-pair after putting the controllers in Switch mode.
If I come up with any other tweaks I’ll follow-up in another blog post, but this gets me up and running with a very slick setup that works without any hiccups (so far).