Upgrading a 2009 13″ MacBook Pro with SSD and RAM
⚠️ This was originally posted on August 6, 2014. The information may be outdated!
My fiancé has a 13″ MacBook Pro from 2009. While it probably worked great when it was new, five years later it had become painfully slow (#firstworldproblems) with its 2GB of RAM and 160GB HDD. A few searches online uncovered others who had similar setups and successfully upgraded them to modern performance standards with an SSD and additional RAM.
A Bit of Background
When I first used this laptop in 2013 (four years after it was manufactured) it was running OS X Snow Leopard. From a cold boot, it took about 4 minutes to load the OS and stop thrashing the hard drive so you could open a browser or iTunes. This was bad even for the hardware it had, so I tried a few different solutions, including upgrading to OS X Lion, fixing disk permissions, and general hard drive cleanup (defrag, deleting applications and files that were no longer needed, etc.).
Nothing seemed to make a difference, and after an agonizing afternoon slowly upgrading to OS X Mountain Lion, I decided to get serious about fixing the problem. The only “free” option that I really had left was to backup the data, reformat the hard drive, and install a fresh copy of OS X. I decided against that because even the best-case scenario would still be slow compared to the SSD speeds I’m used to on my personal desktop and my company MacBook with an SSD.
The Upgrade
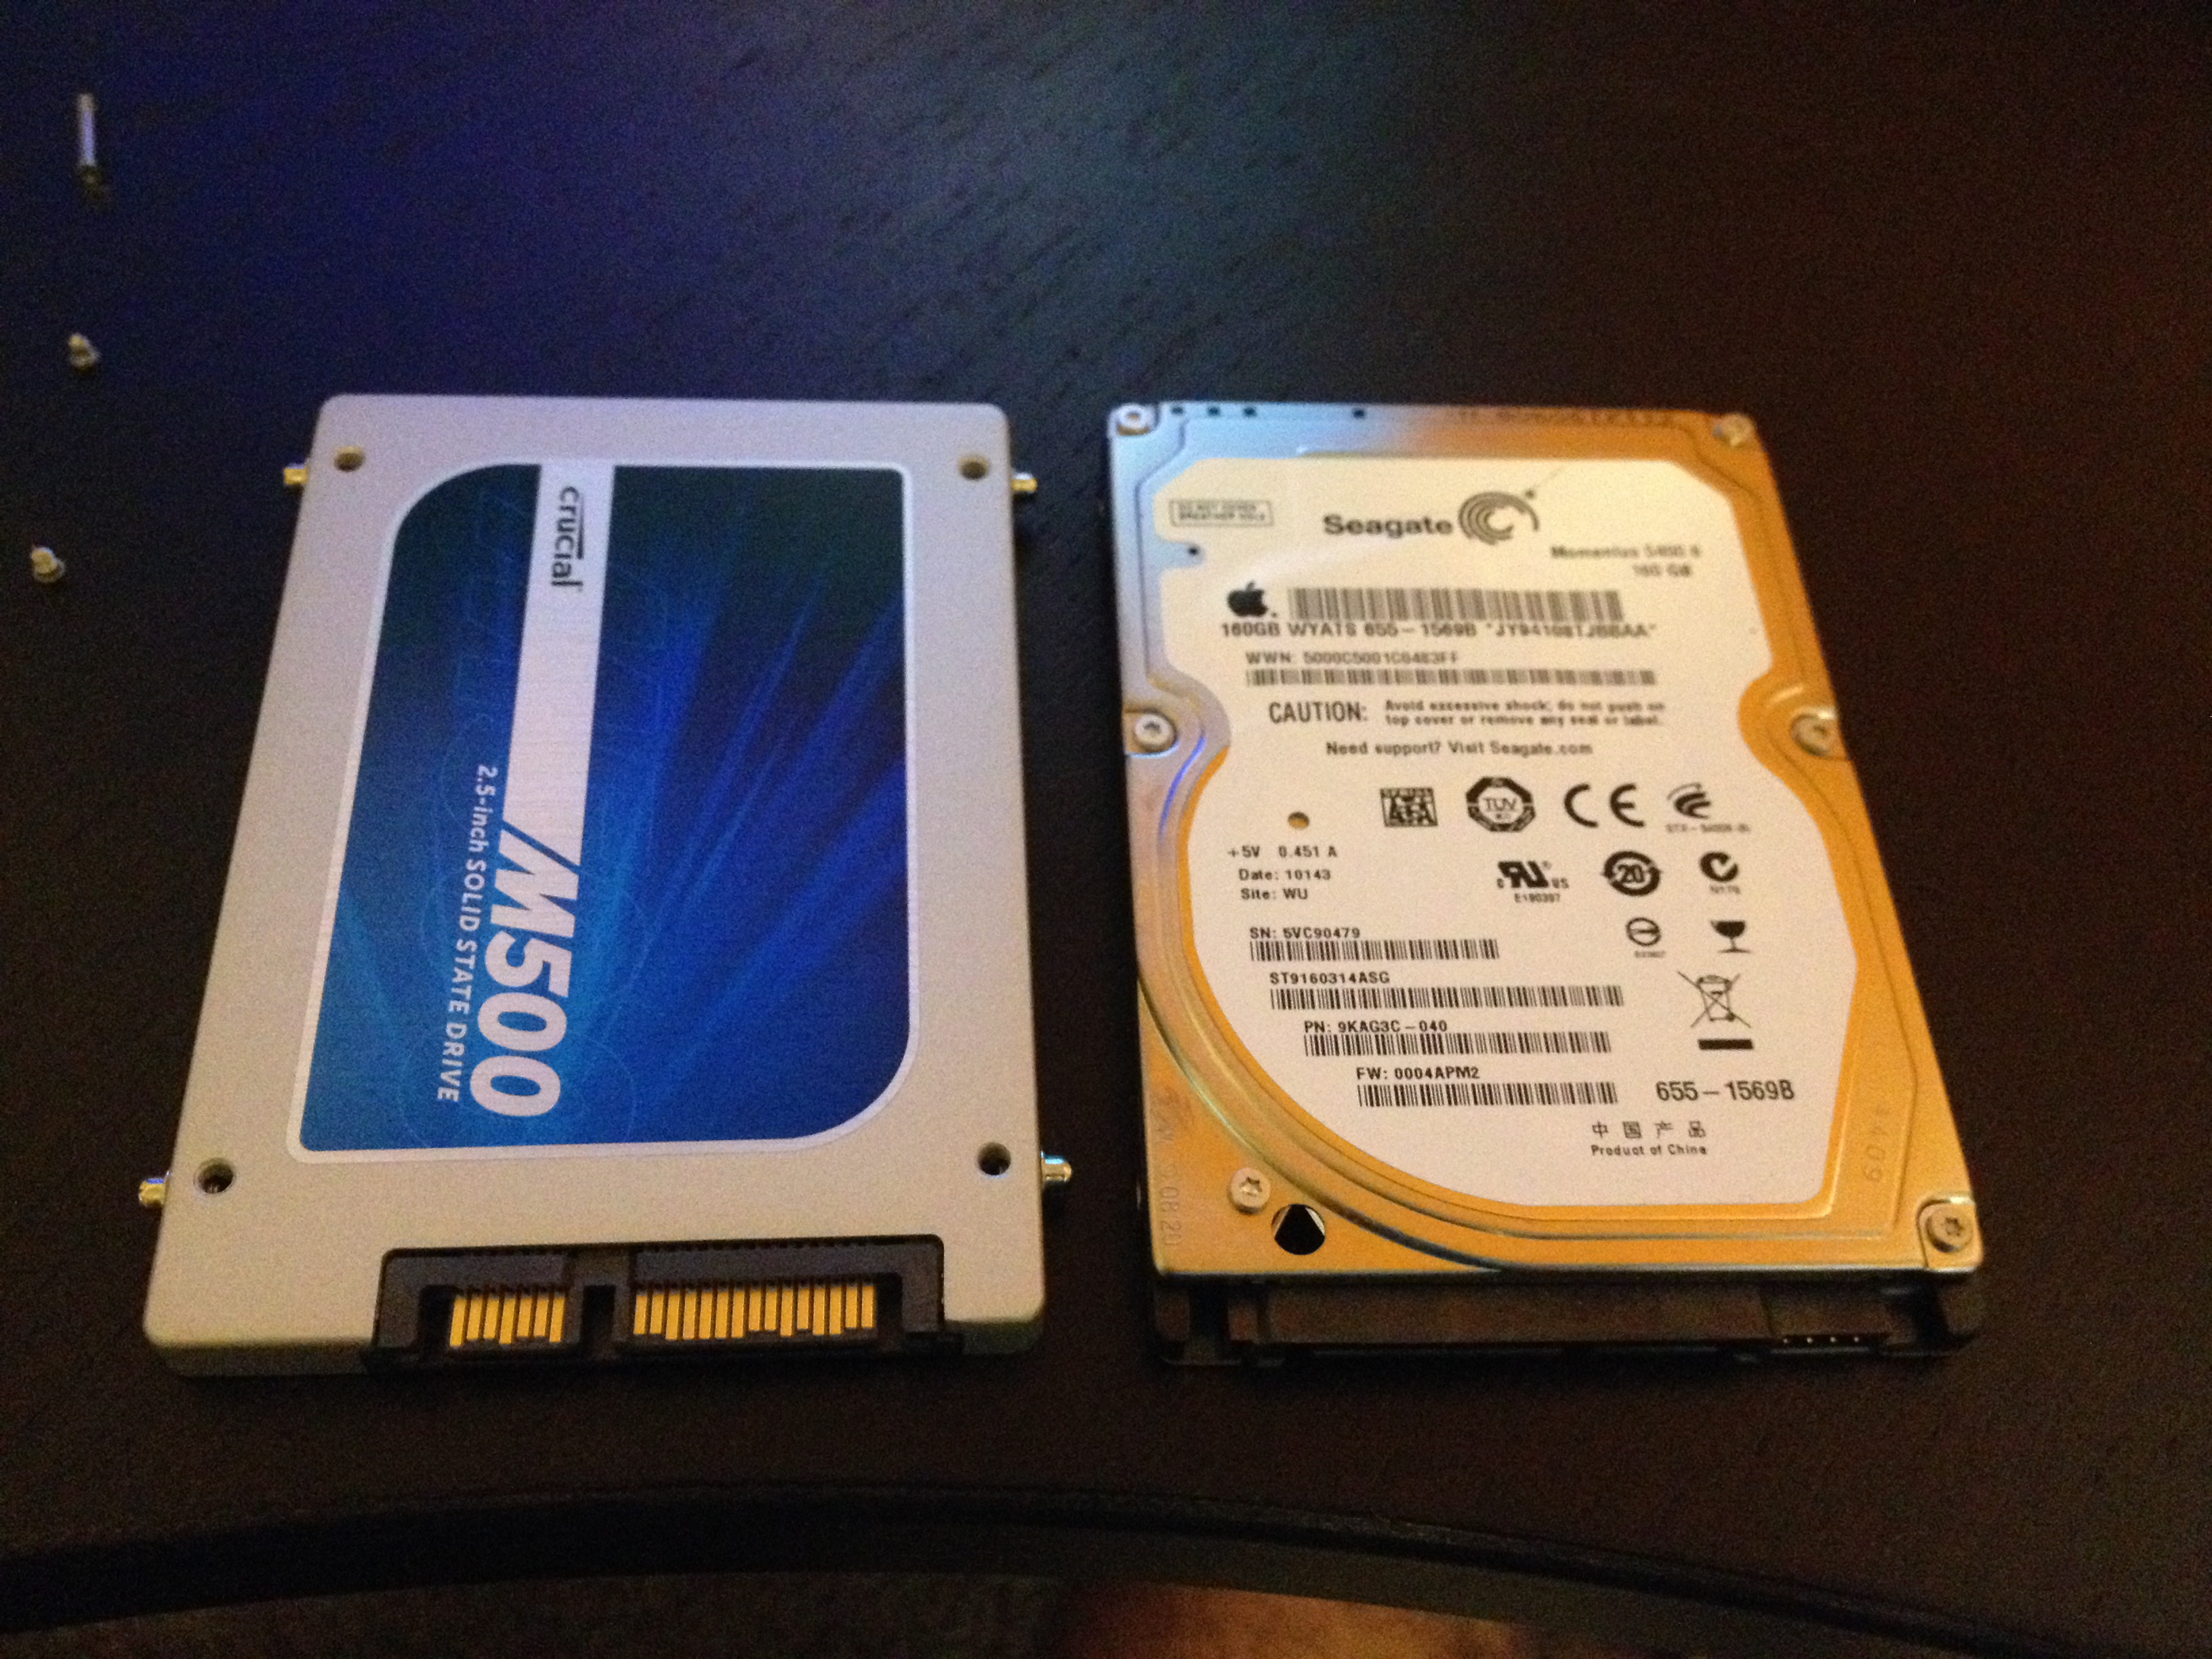
Knowing that others had success with SSD and RAM upgrades in this MacBook model, I decided to pull the trigger on new hardware. After browsing a few discussions on Apple’s support site and reading some reviews, I ordered a Crucial M500 240GB SSD because others reported good compatibility with the specific nVidia chipset (MCP79) in this 2009 MacBook Pro 13″. I also picked up a Crucial 2x4GB DDR3 1066 Mac memory kit.
For the installation process, there are plenty of blogs and tutorials so I won’t go into full details here. I would like to emphasize that you should get a Phillips #00 screwdriver and a Torx T6 screwdriver if you don’t already have them. These are the steps I followed (make sure you avoid static discharge when handling the computer internals):
- Backup any files that you want to keep from the old hard drive. I used an external USB drive and Time Machine to create a backup.
- Create a bootable USB installation drive. I used createinstallmedia and a 16GB USB flash drive.
- Shut down the MacBook. Don’t just put it to sleep; it must be shut down.
- Use the Phillips #00 screwdriver to remove the 10 screws on the bottom of the MacBook. Keep track of where they go because three of them are longer than the others. I set them down in the same pattern they are installed in the MacBook.
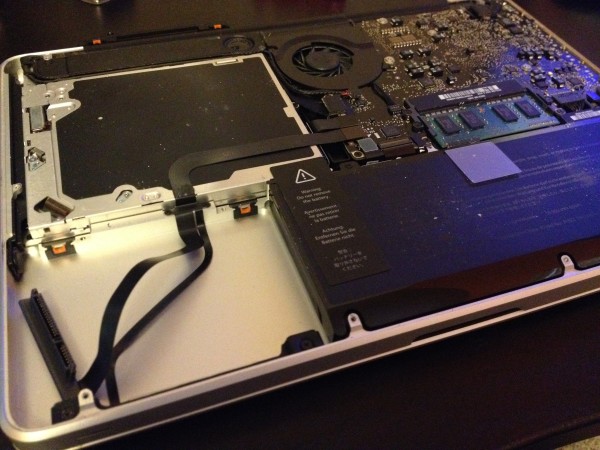
- Take off the bottom cover and use the Torx T6 screwdriver to loosen the two black screws in the black arm/hinge that holds down the hard drive.
- Remove the black arm, then use the pull tab to carefully lift out the hard drive.
- Unplug the SATA and power cable from the hard drive, then remove the four screws in the sides of the hard drive with the Torx T6 screwdriver.
Once the hard drive is removed, it’s a good idea to use some compressed air to dust the internals. - Put those four screws on the new SSD and stick the plastic pull tab on it.
- Connect the SATA and power cable to the new SSD, and carefully place it where the old hard drive was located.
- Reattach the black arm and tighten down the two screws to hold the SSD in place.
- For the RAM upgrade, follow Apple’s instructions.
- Reattach the bottom panel and screws.
- Press the power button and wait a few minutes for it to boot up.
- Format the SSD as a startup drive.
- Attach the bootable USB installer and restart the MacBook while holding down the Option key.
- Select the USB drive to boot from and follow instructions to install OS X.
- Boot into OS X and transfer your data from the backup. I simply dragged and dropped files from the Time Machine backup because I didn’t need to keep any apps from the previous installation.
The Results
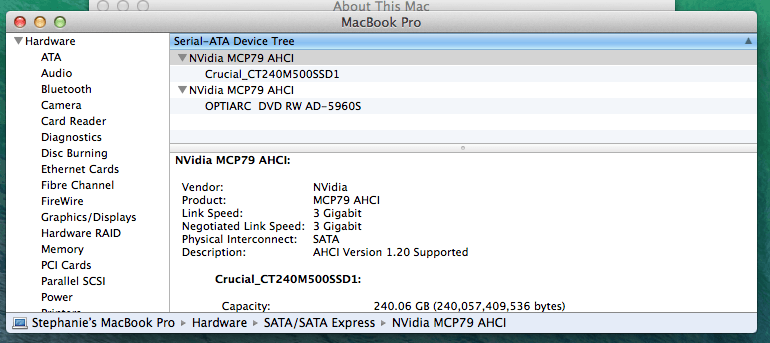
The MacBook Pro now feels like a brand new machine. I’m getting a 3 Gigabit link speed instead of 1.5 in the System Report, and I can boot it and launch a browser in less than a minute. Applications open in a few seconds or less instead of taking up to a minute to open.
I highly recommend an SSD upgrade over a new MacBook Pro if yours is less than 5 years old and you don’t need the latest hardware features like a Retina display or Airplay mirroring. With RAM being relatively inexpensive, it makes a nice upgrade too, especially if you find yourself multitasking a lot.

For about $200 and a few hours of work, my fiancé has a MacBook Pro that performs her daily computing tasks as well as a $1,000+ brand new model.