Control Z-Wave Devices with Home Assistant Using an Aeotec Z-Stick

Series: Creating My Smart Home
- Making All of My Smart Home Devices Work Together with Home Assistant
- Initial Setup and Configuration of Home Assistant on a Raspberry Pi
- Control Z-Wave Devices with Home Assistant Using an Aeotec Z-Stick
- How to Fix GE Z-Wave Switches Not Updating in the Home Assistant UI
- Track Home/Away Status for Your Household Using Their Smart Phones and Home Assistant
- Add Alexa Voice Control to Home Assistant with the Emulated Hue Bridge
- Control TP-Link Smart Plug with Harmony Hub via Emulated Hue Bridge
- Add System Monitoring to Home Assistant
- Organize the Home Assistant Web UI with Groups
- Set Up Secure Remote Access for Home Assistant
- Install and Configure the Home Assistant iOS App and Enable Notifications
⚠️ This was originally posted on July 19, 2017. The information may be outdated!
One of my goals for creating a smart home is to keep things as “guest friendly” as possible. With that in mind I decided to go with Z-Wave switches to control the lights and fans in our common areas (kitchen, family room, etc.). These switches work just like a regular switch–perfect for guests–and they can also be controlled and automated with Home Assistant.
The documentation for Z-Wave on home-assistant.io is pretty good, but I found myself unsure how to proceed in a few places and had to find advice in the community forums. Mostly it amounted to restarting Home Assistant or rebooting the Raspberry Pi if Z-Wave devices didn’t show up the way they should. I wanted to document the steps I took here to make this process a little less involved in the future. I’m currently running Home Assistant v0.48 with the Hassbian v1.23 image. Also note that I’m using an Aeotec Z-Stick Gen5 USB adapter to control my Z-Wave devices; this is well-liked by the Home Assistant community and seems to be a popular choice.
To start, plug the Z-Stick into a USB port on the Rapsberry Pi (remember which port), log into the Pi via SSH as the “pi” user and install libudev-dev package per the Z-Wave documentation for Home Assistant:
$ ssh pi@your_pi_ip_address
$ sudo apt-get install libudev-dev
The installation may take a few minutes. Once complete, find out which USB port is running the Z-Wave stick:
$ ls /dev/ttyACM*
Then switch to the “homeassistant” user and edit the configuration.yaml file.
Near the bottom of the file, add a zwave: section and enter the usb_path for the Z-Stick using the port you found a moment ago:

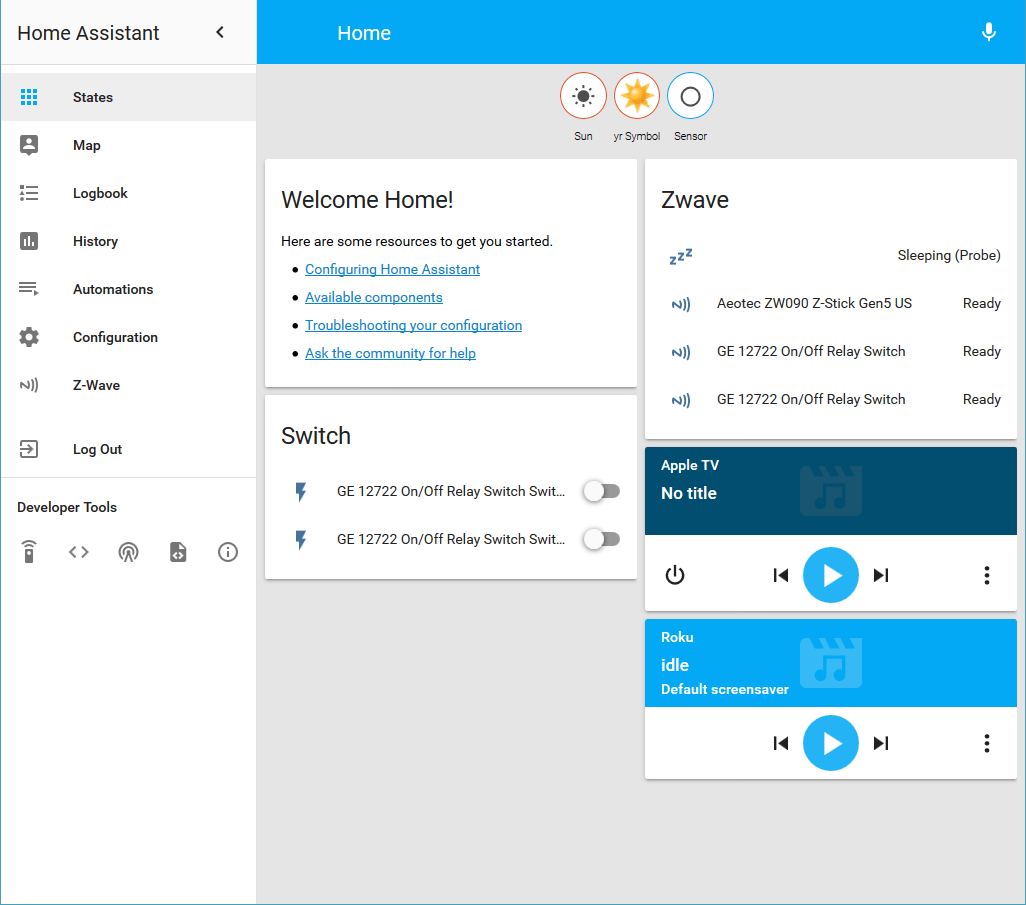
In the web UI, navigate to the Configuration section, check that the configuration is valid, then scroll down to the bottom of the page and press the Restart Server button. Wait several minutes (it can take 5 – 10 minutes to initialize everything after adding Z-Wave for the first time), then refresh the browser. If after about ten minutes the web UI won’t load, you’ll need to check the log file for error messages. Once Home Assistant is up and running again, you should see a Zwave group in the States panel as well as a new Z-Wave link in the left menu:

The Z-Wave devices probably won’t have the correct names, so you’ll need to restart Home Assistant a second time in order for things to be named correctly. If there is an error loading the zwave component, restart the Pi itself via SSH:
$ sudo shutdown -r now
Now the Z-Stick is should be showing up correctly:

At this point go ahead and add any other Z-Wave devices you have using the Z-Stick instructions. I just unplugged the Z-Stick from the Pi and carried it around to each device to add them; one of the great features of the Z-Stick is that it has an internal battery and you can carry it around unplugged. Make sure you plug it back into the same USB port when you’re done adding devices.
Once additional devices are added you may need to restart Home Assistant or the Pi itself for them to show up correctly. Another potential issue is with “sleeping” Z-Wave devices. Notice in the screenshot below that one of the devices is “sleeping” and has no name. You may need to wait for sleeping devices to wake up before Home Assistant can display them properly. In this case it was my Ecolink garage door tilt sensor and I had to wait almost an hour before it showed up correctly.
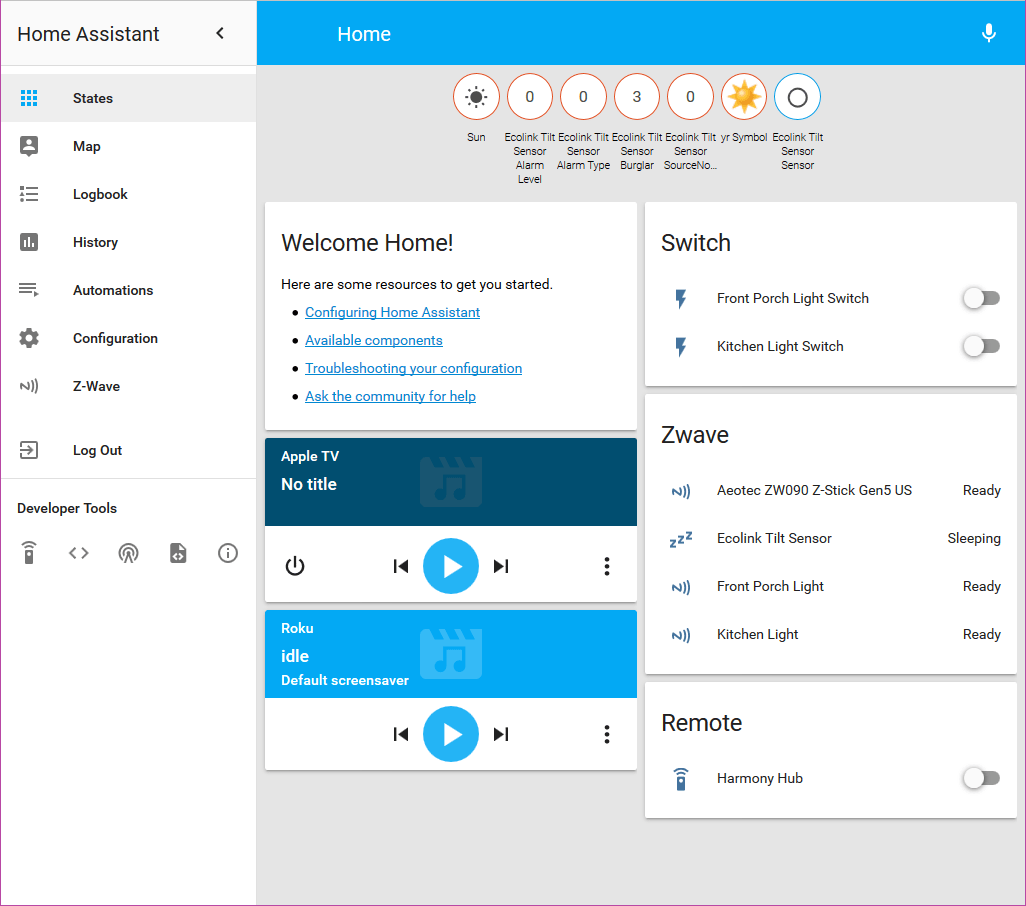
As of version 0.48 of Home Assistant, Z-Wave entities may have IDs that are the same and therefore conflicting. It’s a good idea to open the Z-Wave panel from the left menu and rename each Z-Wave node to something unique and descriptive.

Restart Home Assistant for the new names to take effect. This will also update their entity_id so you should do this before creating any automations, etc. that use them. From this point on When you need to add a Z-Wave device, the following steps should work:
- Unplug the Z-Stick from the Pi (remember the USB port it was plugged into!).
- Take it near the new Z-Wave device and add it per the Z-Stick documentation.
- Plug the Z-Stick back into the Pi using the same USB port.
- Reboot the Pi, wait for Home Assistant to initialize, and see if the new device shows up in the web UI.
- If the new device is not named properly, restart Home Assistant. It should now be named properly.
- Rename the node for the new device before using it in any groups, automations, scripts, etc.
I hope this helps others who are just getting started with Home Assistant and Z-Wave. I did run into a couple more Z-Wave device issues that I’ll cover in more detail in a future blog post.